
|
EFFECTS OF DIFFERENT DIFFUSERS FOR PORTABLE FLASH UNITS |
|||
|
(This page
opened in a new window. |
|||
| Light Plot and Shooting Data |
The examples on this page were all shot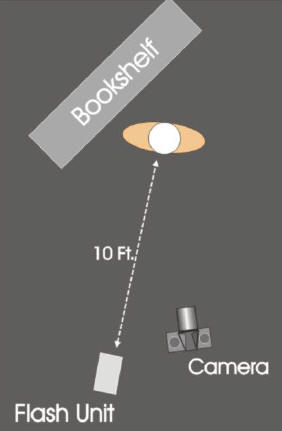
as follows: Location:
My Living Room
|
||
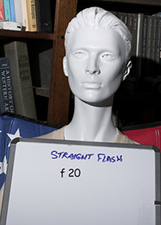
| 1. Bare Flash | The first shot in the series is
straight flash out of the Sunpak 622 pro with no modifiers over the flash
reflector. For comparison purposes note the sharpness of the shadow under the chin and around the nose and of the shadow on the books behin |
 |
|
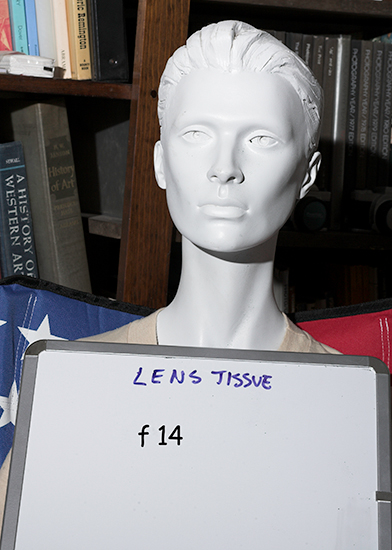
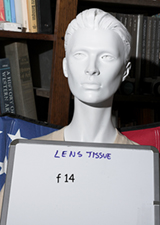
| 2. Lens Tissue Diffusion | Here is an old photographer's trick of using a sheet of lens tissue over the flash to diffuse the light. It did change the color a little bit but the shadow quality is almost identical to the bare flash shot although the light is starting to "wrap" the subject a little better. |
 |
|
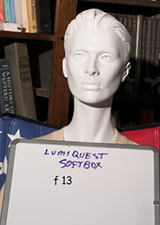
| 3. Lumiquest Softbox | This shot was made with a Lumiquest Softbox. This unit does not have a secondary inner diffusion panel like studio softboxes. It warmed the color a little and has a very slight softening to the chin shadow and it has opened up a tiny bit. |
 |
|
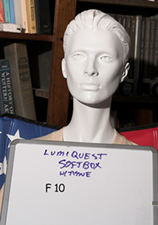
| 4. Lumiquest Softbox with lens tissue inner diffusion | Here I added a lens tissue over the flash lens behind the soft box to see if it would make a difference. It did cut down a little on the light output but I'm hard pressed to see much qualitative difference however the cheek shadow seems to have opened up a very slight amount.. |
 |
|
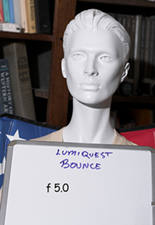
| 5. Lumiquest Midi-Bounce Attachment | This shot was taken using the
Lumiquest "Midi-Bounce" attachment. It has cut down on almost 3 stops
but otherwise looks very much like the softbox version except the color is
cooler. Opening up to f5 had a definitel softening of the background due to diminished depth of field. |
 |
|
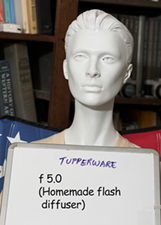
| 6. Home Made Bowl Diffuser (with thanks to Gary Fong). | This shot was taken using a
homemade diffuser based on Gary Fong's "bowl" diffuser. I simply used
a translucent Tupperware bowl with a piece of foil in the back to redirect
some of the light forward.
This not only made a noticeable softening, it gave smoother tonalities and opened up some of the background. The hot highlights on the mannequin's brow and nose are almost eliminated. The softer back-ground is due to the diminished Depth of Field at f5. |
 |
|
| Below, the six versions are grouped for better comparisons | |||
 |
 |
 |
 |
 |
 |
End of Page