(This page opened in a new window. To return to main web simply close this window.)
(This page
opened in a new window.
To return to main web simply close this window.)
|
DEMO SHOT FOR |
|||
| (There are 4 Images in this series. Scroll down to view them in sequence from camera original to finished version.) | |||
|
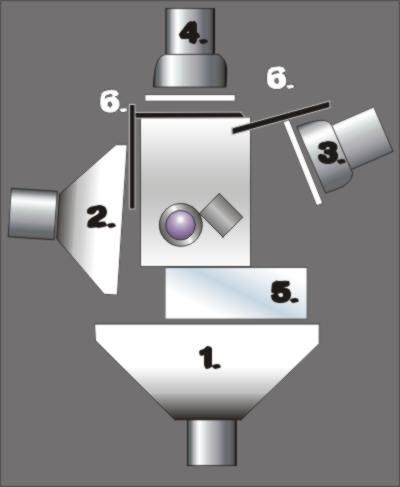
DEMO 02/16/2010 This was a demo for the "Small Product" Assignment for a solid object with texture. unfortunately I left my intended object at home so decided on the spot to use a couple of the lenses in the instructor's camera kit. The lights and modifiers are number in the order placed and used. 1. A large softbox to create the general overall light on the subject. 2. A smaller softbox to provide the general modeling and texture. Technically this is the main light. Although the softbox is smaller because it does not scatter light as much more of it is directed at the subject. 3. A small reflector bowl with a difussion gel. This will add dimension and separation to the items 4. Another small reflector bowl with a larger diuffusion gel to put light in the lens and highlights on the rims 5. A white bounce card to add some light to the front of the lenses 6. Flags to cut back some of the spill light on the very shiny background |
Here is the set up and light plot for the demo showing all of the lights finally brought into play. I was originally going to use a black background but because the lenses were black when prowling through the props drawers in the studios came across the fabric for an old folding reflector. I thought it would be an interesting backdrop but it added problems I did not anticipate, as you will see.
The background was so reflective that when enough light was placed on the black lenses the background itself was nearly blown out so flags were employed to try to cut down the light on the background. In fact, to be brutally honest, many of the lighting and editing processes have been done to accommodate a hasty choice in backgrounds... what can I say?
|
||
|
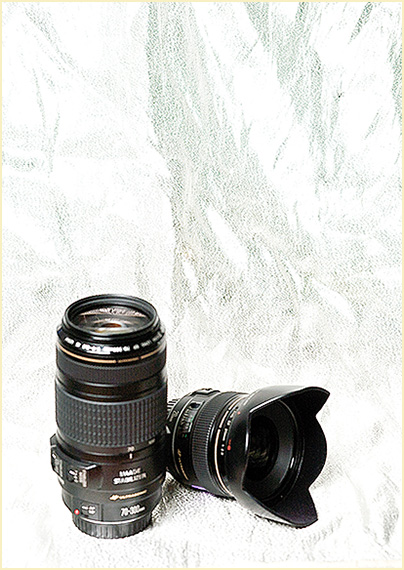
Here is a test shot with the number one
softbox by itself. This was to judge composition. I composed the shot so that at the top of the frame there would be room for a logo and copy for an advertisement. What is already becoming apparent is that a sufficient exposure for the black lenses will blow out the reflective background. This will get worse as more lights are added to it. And more light is needed to create a proper dimension to the lenses. An additional was that the auto focus on the lens was turned on so it was trying to focus on the background and not the subjects. You can see the zoom lens is quite out of focus while what you can see of the background is sharp. I turned it off and proceeded. |
|
||
|
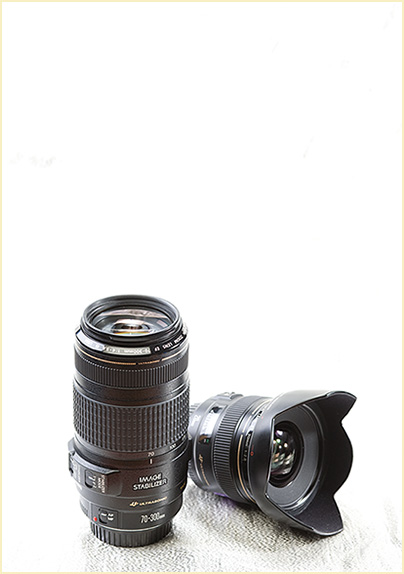
This is a shot with all of the lights placed
and then turned on. You can now clearly see the dimensionality to the
lenses and they no longer bleed into each other where they touch, Plus
the lower lens's from is now illuminated. Unfortunately, the background is completely blown out. I thought at first this would be a workable compromise but did not like it when I saw it in the monitor. It has lost all of the character I wanted from the material and also created bizarre mottled shadows below the lenses. Worse still, the highlighted edges now bled into the background. Something was needed to drop that background tone. I brought in the flags seen in the light plot to block off light spill but although it evened it out visually it did not lower it enough to make it appear even close to my plan. I added a reflector to the front to add light to the lenses themselves. (You can see its effect in the next shot.) Like the flags, it improved the situation but did not solve it. |
|
||
|
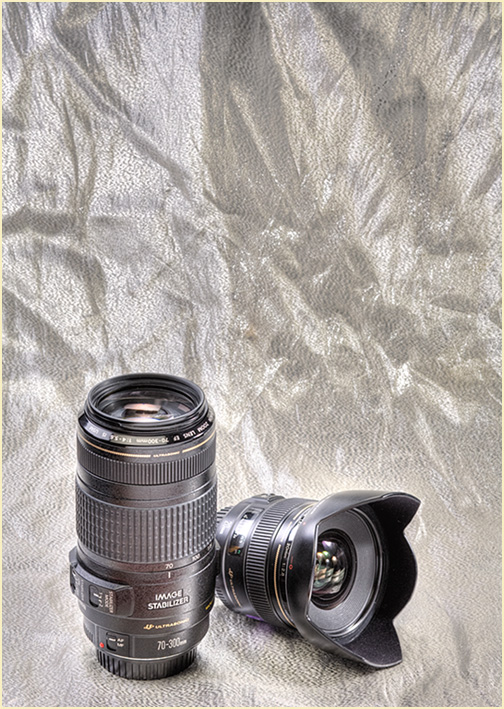
The Dynamic Range was simply too great.
This was not an issue of light power so much as an issue of light spill onto
the background from angles that reflected back into the camera. Had the material been bigger I could have made the items be further from the background, if we had lots of proper scrims and flags and honeycombs for the softboxes we could have better isolated light spill. If... if... but we had none of that available. But we were shooting digital and there is a simple solution. I took 3 exposures of it and generated an HDRI/Tonemapped version. Now we have a image we can bring into Photoshop and work with as well as add the graphic elements for an advertisement. |
 |
||
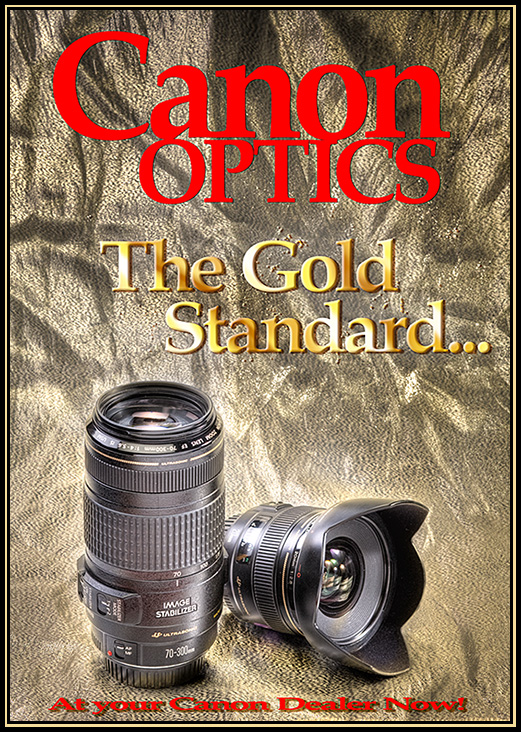
| OK, so what can we do with this? Since it was for a simulated advertisement and since it is a shot of Canon lenses then that is our direction. The result came from looking at the gold bands on the lenses and deciding to play with that color and concept. Now that I've seen it done in a makeshift way, I'd love to start over, use gold foil or gold mylar as the actual background material and have more to work with. I'd also love to have some gold coins or even a bar to lay around the lenses to carry the theme forward a bit more. Oh well...
|
 |
||
End of Page